Carving hooves is a tedious, but worthy task. If you're a live show goer, or just appreciate realism in your models, carved hooves are a must. How do you achieve realistically carved hooves, and what do you need to do it?
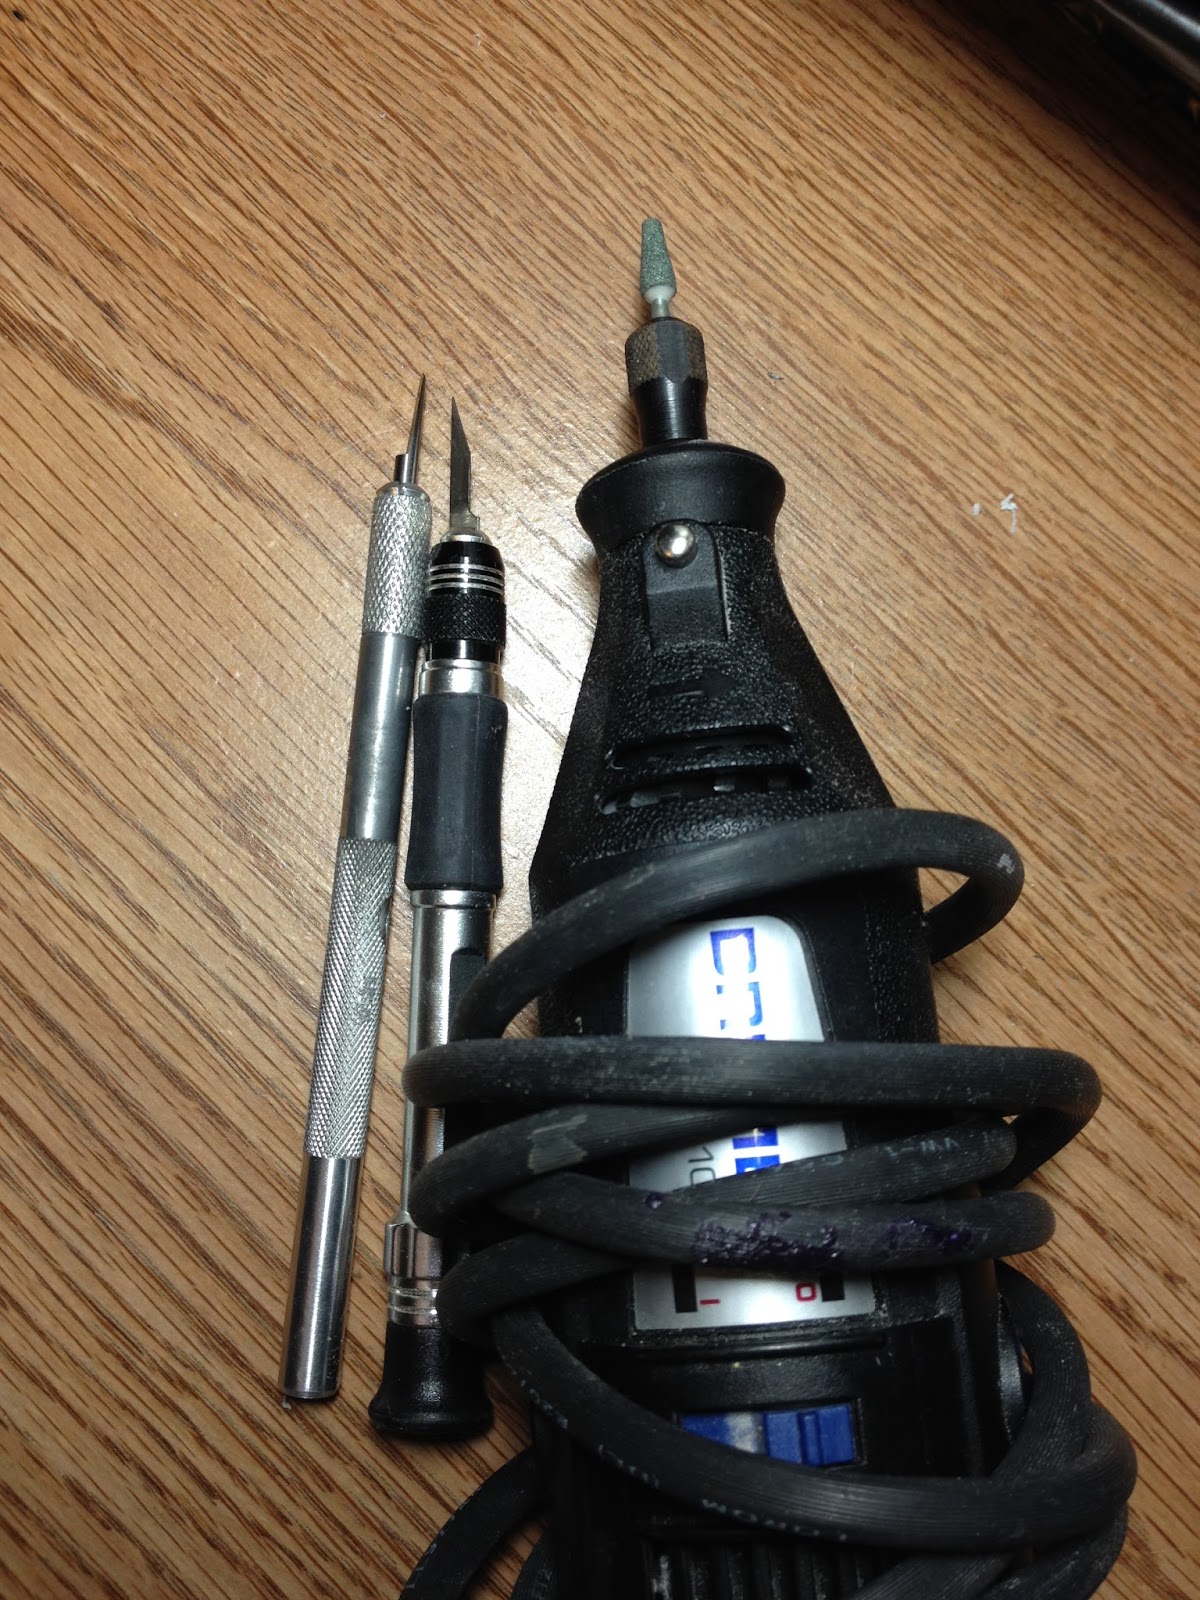
Carving hooves can be done with a rotary tool (such as a dremel), a scalpel/x-acto knife, or carbide scrapers.
The dremel gives you little control, but has the bonus of giving a quick, passable hoof. The scalpel is dangerous, and if you're clumsy like I am, you'll end up carving into yourself more than you will the hoof. The only time I would recommend using a scalpel to carve hooves, is if you're carving out a stablemate's hooves or refining already carved details. And barely even then.
The carbide scraper (available at
Rio Rondo) is by far my most favourite tool for this. I have complete control over how much I carve out and what I carve out. Plus, I can't cut myself (at least, I haven't yet,) and there's the added bonus of it being a manual tool! If you know me, you know I'm terrified of power tools.
In 6th grade I broke the belt sander in woodshop and just barely missed cutting my hand off. The belt got the pad of my middle finger pretty good (split it wide open; there was so much blood I didn't know where I was bleeding from, because I couldn't feel anything). Ever since, anything that makes loud noises makes me nervous. Especially since I'm prone to blowing things up. (I accidentally blew up a hot glue gun for crying out loud! And my washer just a few months ago!) If there's a manual alternative to using power tools, I will ALWAYS take it.
I use tips CS02 and CS04 to carve hooves. (I also use CS06 which I forgot to add)
Make sure the hooves you're about to carve are prepped. Check to make sure the angles are correct (or close) and that the sides aren't flared or bowed. Below are examples of the correct angles.
and good sides.
Take a rat tail file or emery board and make sure the underside of the hoof is flat as well. There shouldn't be any seams or bumps. Shallow divots can be worked with, or you can fill them with epoxy if you wish. Make sure you keep the hoof level as you file. Check down the heel of the hoof to make sure one side isn't longer than the other.
The heel of this hoof is level, the sculptor made one bulb come lower than the other.
I'll raise it and it'll be perfect.
Also, try not to rock the file as much as possible. We want the bottom to be flat so it has continuous contact with the surface of the table or desk. There's a slight arch in the hoof above, which is okay. It's shallow enough that when it's carved, it'll sit well. We just want to avoid having the arch so severe that one part (or more) of the hoof lifts off of the surface.
Now, let's take a marker (like an ultra-fine sharpie!) and draw out what parts we DON'T want to carve. This will be te wall, the frog, and the bars. When I started carving the hooves on this model, I didn't keep the bars. Since the front hooves don't have bars, I won't include them in the back just so it's even and I'm happy. However, you will want to include the bars in yours, because real horses have them.
The underside should look something like this:
The wall, frog, and bars should be marked with ink.
The sole, central sulcus, and collateral grooves should be white.
Remember, I'm leaving the bars off simply so it'll match. Add them to yours!
Now, starting with tip CS02, we're going to start carving out the general concavity of the hoof. Start by carving out the collateral grooves. I'm using CS04 for this because I'm not adding bars and don't need a fine tip. Use CS02 if you're adding bars (and you should be!) Your goal here is to separate the frog from the sole. Get right up on that frog, but don't touch the ink just yet.
Take it deep enough that you can carve the sole out and still have a groove. Don't be afraid to make it too deep - you can always go back in with epoxy later. Start angling your scraper away from the frog so that you'll widen the bars as needed. (
Use a reference for this.)
Now, switch to CS04 and carve out the sole. try to leave the bars alone as much as possible. It's okay if the ridge of the bar is accidentally removed, as long as there's a definitive change between the collateral groove and the sole.
It's okay if it looks rough in this stage.
Refine the smoothness of the sole with CSO4 and then switch back to CS02 and start refining the hoof wall and frog.
I continued the collateral groove past the heel of the wall at this stage as well.
Keep switching back and forth until it starts looking smooth and refined. Then, switch to CS04 and add in the details in the bulb of the heel. (It's hard to see, sorry!)
Now, take either CS02 or CS06 and add in the central sulcus. (angle your tip so that it's running along the line if you're using CS02 for this. This'll make a narrow groove, which is what you want.) You can go back in with a scalpel afterwards, to deepen the groove or refine the area if you want to.
Once you're satisfied with the result of the carving, grab your file and - in an even, circular motion covering the entire hoof - file the hoof flat until you can't remove any more ink.
This will flatten the frog, too, so go back with CS04 afterwards and round it out again.
At this point, if you have any pewter shoes you would like to add, make sure they fit. Otherwise, take your file and, at the edge of the hoof, angle it at around 45 degrees and
bevel the edges of the hoof.
And you're done!
I hope some of you can put this to use! If you're serious about model horse customizing and you don't have one yet, I highly recommend you get the Carbide Scraper set. I can't live without it now that I have it!
If you have any topics you want me to cover in future posts, please leave a comment! I'll try to cover as many as I can!
Over and Out!


