Sunday, November 15, 2015

Quest to Find the Spring

Yesterday, I headed out to look for the fabled spring Mamaw keeps telling us about. We live on 6.5 acres of land, which has its own spring. Once upon a time, mamaw grew up here, and the area which I've been taking photos of (the wooded areas) used to be a pasture for her mules. The trees hadn't existed there, then, but have since grown due to neglect. Anyway, Mamaw tells of a spring that is the only other pure, freshwater spring that you can safely drink from (the other spring being up the road a ways,) within the bounds of our land. She used to use it to get drinking water when they were building her current house in the lot across from our land. Papaw swears it was tested, and passed as clean. Now it was just my job to find it.

Back in March, I thought I had. However, I was only half right. That area IS perpetually soggy, because it's being fed by the spring. I was concerned and ready to abandon the spring idea when I saw the area covered in trash and jars. Even now, as I walk around it, the ground groans beneath my feet and I have to tread lightly, because I'm not walking on solid dirt: I'm walking - literally - on glass. Full jars now make up the ground around that area, and one wrong step can send your foot and ankle gushing blood.

Well, the night before last, dad tipped me off about the actual spring. "Tammy's mom (Tammy's our neighbour) asked us if she could fence that area in for her cows. Just look for the fence. There's an area where a tree fell on it, and you can just step over it there. It's in there," he'd said. I knew exactly where he was talking about; a while back I had seen donkeys behind that fence, so I assumed that was Tammy's land. I brought this up with him, and he assured me that was our land, we were just letting her use it.

So yesterday I headed out to find that fence.


As I headed toward the entrance to the trail, one of my neighbour's dogs approached me. She's one of the mellowest, sweetest, and fattest dogs I've come across. She was friendly and loved the scratches and pets I was giving her. When I was done giving her attention, I headed in to the woods, only to notice I had a shadow. She followed me the entire way to the spring, mostly lagging behind, but she also showed me some of the easiest ways around the thorn bushes, and even showed me the way back out. I enjoyed her company, and I'm sure she enjoyed mine. 

Together, we found the fence my dad had told me about, and ventured on. As I picked my way through the brush, I noticed down the hill, a pond. At first, I thought it could be the spring. But then, I recognized the area it was in - though I had never been there, myself. It's up the road past the cobb house at the base of the property. Cobb's pond, I thought. I remembered papaw telling me the spring feeds a pond the Cobbs had built, and as a result, I may only be able to find it with my feet.

My feet. I knew he meant I would get my feet soaked when I found it, but I had another thought. If the spring is feeding a pond, then there has to be a stream leading down to it. I looked down, and sure enough, a few feet in front of me, hidden under the leaves and weeds, was a clear, trickling stream that was flowing down toward the pond. 


I let the dog know we were moving and held a bush out of the way so she could walk ahead, before following her in the opposite direction, up-stream, of the pond. It didn't take long after that to find it. She walked straight up to a puddle and dropped her nose to it, gratefully lapping up a few drinks.


I had a roll of ducttape around my wrist, and a broken narrow tree (which I will refer to as a branch), as well as a sleeve of lime green muslin in my hand. Dad had told me to mark the spring with something bright when I found it, so we could find it easily later. I had thought about marking this spot, but decided to try and find the center. Besides, I hadn't gotten my feet wet yet, and I wanted to see how wide this thing was.

I took a step to my left, and immediately, icey water crept through the fabric of my shoe. "That's definitely it," I had said aloud, as if I needed to confirm it with myself. At this point, I decided, "to hell with it," and trudged through the mud and water to find the center. I took the branch and shoved it as far into the mud as it would go, and then slipped the sleeve of muslin over the top of it, securing it with ducttape. I wrapped the top in ducttape, too, to keep it from rotting too quickly. After all, when's the next time I'll be over there? I wanted it to last a few months, at least. 


At this point, I was done, and the dog knew it. She looked at me, and then left. I watched her, seeing the route she took. I would follow this same way later. I just had a few more photos to take. 


We weren't far from the original path. Actually, we were just beyond the trash seen in an earlier photo. Luckily, the spring was unaffected, though I'll get it tested to make sure any toxins didn't leech into it. It definitely looked, and smelled, clean, though, (the leaves make it seem darker than it is) and my family swears on its purity. Still, I'd rather be sure, than take the words of people who drank from it potentially 26 years ago.

If it is clean, though, this is excellent news! 

Tuesday, November 3, 2015

Drawtober 2015

Since I doubt I'm going to do any more for Drawtober (It's november so technically it would be drawvember at this point,) I decided I should post what I did get done, here.

So, here you go! Enjoy!

Day 1: Ghost


The first prompt was "Ghost." I really didn't know what to draw scene-wise and didn't want to do a basic casper-type ghost. I wanted to actually put some effort into it. So, I drew a woman. It's a start. Then I realised, she had to have a scene. No one would know she's a ghost, if she didn't have some transparency. (And you can't have transparency without a background to give the idea)

Originally I was going to have her standing on a cliff like a reference to GTA V's Mt. Chiliad ghost easter egg, but decided I didn't want to (because all of my cliffs are the same.) So, I put a noose around her neck. Then I tried drawing her somewhere (a siloh? I don't even know) but realised she wouldn't be up high about to jump if the rope is already cut. so, I drew a tree. And I put her at the base of it.

I liked this idea, because it could go one of two ways: Suicide, or Murder/Lynching.

Then, I gave it a simple background, and I was satisfied with it enough to let it be.

Day 2: Devil


The second prompt was "Devil." So, naturally, I drew Lucifer (Mark Pellegrino) from Supernatural. I don't think I got his face shape totally right. The background was supposed to be black but at that point, I had already poured two days' worth of work into it and I just wanted it to be done. I tried to get it as close as I could.

Day 3: Goblin


The third prompt was "Goblin." To be honest, I couldn't remember what a goblin looked like. I had to google it, because I had the image of an Orc stuck in my head, and I knew that was an Orc and not a Goblin. After I refreshed my memory, I couldn't shake the idea of a thief. I decided to go with it. So, here we have a goblin smiling at the jewel he snatched!

Day 4: Vampire


The fourth prompt was "Vampire." I wanted something easy, because I was still trying to get caught up (hence why no backgrounds) so I decided to draw my skyrim character as a vampire - because I was already going to draw a skyrim vampire. I'm actually a werewolf in-game, but I was a vampire once upon a time. I took some reference photos after stripping her in the middle of whiterun and terrorising the town trying to brawl whilst holding a torch. Then, I got a reference for the vampire armor, and a pose reference, and got to work!

Originally I was going to have her hold a battleaxe, because if I'm not using my Sanguine Rose/Daedric Sword of Leeching combo, I'm usually wielding an ebony battle axe. That was until I realised I can't draw battleaxes to save my life. So, I started looking at swords. I was just about to settle on the dragonbone sword when I remembered: The Bloodskal blade exists. What better sword for a vampire than a sword themed of blood? I still think I got the angle of the sword wrong, but I'm willing to live with it. 

Day 5: Werewolf


The fifth prompt was "Werewolf." I already knew as soon as I saw that on the list, that I was going to draw the skyrim werewolf. I have way too much fun ripping people to shreds as this creature, I couldn't NOT do it. Plus I like the design, because it matches the idea of a man-dog, without the traditional hollywood lumberjack look. (Which is to be expected since flannel shirts and jeans didn't exist in the time skyrim takes place, but y'know.)

I'm REALLY happy with how this came out.

Day 6: Pumpkin


The sixth prompt was "Pumpkin." I didn't really feel like using a large piece of paper for something so basic, so I didn't. The actual drawing is about the size of a postage stamp.

Day 7: Haunted House


The seventh prompt was "Haunted House." I really liked the idea of drawing a building. It's something I don't do in detail very often, so this was the perfect time to work on that. I googled around for abandoned buildings and came across this house that was found abandoned in the middle of a Russian forest. It was perfect. I worked all night on this because there were so many details I had to put in it that I couldn't rush. I like the result, at least.

Day 8: Zombie


The eighth prompt was "Zombie." This took some thinking. My first thought was, "Let's draw a zombie horse! I've never coloured a zombie horse, so that would be a nice thing to see!" I decided against it. I always draw zombie horses. It's part of my job as a customizer and sculptor who specialises in zombie horses. Everyone knows I can draw an undead equine. When was the last time I drew a proper zombie? (I can tell you. This was.) Then I was thinking, "Well, who can I zombify?" The thought crossed my mind to draw a Walking Dead zombie, but let's be real. Everyone thinks of The Walking Dead when you mention "zombies." Unless, of course, you're a gamer. Left 4 Dead 2 popped into my mind immediately after I dismissed TWD. Perfect. The last time I drew a Hunter was back in 2010/2011, and it was time to see what I could do with my improvements.

I'm not disappointed.

One thing I wanted to do with this rendition, was to make him look more like an undead. Other than the dead skin, they didn't really design him to scream "zombie." (literally. He screams "rye" instead.) He seemed more like a freakishly powerful parkour cannibal. So, I tried to corpse his skin up, and gave him a very basic "no-lip" mouth. Oh, and I also emaciated him, and gave him "natural" dead eyes. Other than that, I left his design alone. (I realised I forgot the blood around his eyes. I'll be adding that later.)

Day 9: Eyeball


The ninth prompt was "Eyeball." I originally had the idea of having a severed eye lying on a medical tray in focus, while having someone (a mad scientist more than likely) extracting the other one from a strapped down victim with the victim screaming in the background out of focus, but I had just spent close to 10 hours on the Hunter, it was 5AM and I just wanted something simple. I googled references for the eye, and one of the search results was of two eyeballs in a red liquid (presumably blood) in a wine glass. The perspective was from the top looking down. This got me thinking: Martini for a Cannibal. The martini came to mind specifically because of the olives. I figured that if I put the eye in the olive's place, it would work. So, then I was searching references for martinis, and up came one of a pomegranate and something or other martini, that looked perfect. So I used it as my reference, along with one of the eyeballs I had picked out earlier.

It's basic. I like my first idea better, but it does the trick.

That's as far as I got, but I hope you enjoyed them anyway! 
That's all I have for today!

Over and Out!

Monday, November 2, 2015

Coloured Pencils = Zombies

With last month being October, I was very interested in participating in Drawtober/Drawlloween. I had gotten up to the 9th day, when I quit. I just wasn't feeling all-that-motivated to draw. When my friend had seen my drawings, she offered to give me her coloured pencils. She had a pack of 50 that she wasn't using, and she was shocked to know that I only had a basic pack of 12 coloured pencils. I accepted, without hesitation. using coloured pencils allows me to add shades and colours as I would a graphite pencil, which I have become accustomed to. I did the first 9 prompts of Drawtober traditionally, because lately I haven't been able to complete a digital painting.

So even though I quit on drawtober, I still had this pack of 50 pencils and I knew I needed to use them. That's what I got them for, after all!

The 8th prompt of Drawtober was zombie. When I was thinking about what exactly to draw for this prompt. the thought crossed my mind to draw a zombie horse. After all, I had never coloured one up to this point, and it was something I wanted to do. I decided against it, solely because I draw zombie horsess all the time as concepts for my work. When was the last time I drew a proper zombie? 2012, if I remember correctly

I ended up drawing the Hunter from Left 4 Dead 2 - with, a few minor tweaks.


As I was looking at this pack of coloured pencils, I thought back to how much I wanted to draw and colour that zombie horse. Shia Labeouf echoed through my head:


 So I did.

Seven coloured pencils and four hours later, I emerged with this:


It won't end there. I plan to give it a full background, be it traditionally or digitally after turning it into a painting. I have yet to decide which. 

Regardless, I love the calmness of the horse, despite its current state. Remember this, as I have plans for it in the future, 


Over and Out!

Sunday, October 18, 2015

The Zombie is Mutating!

I did some more work on the Shasta zombie while I take a break from Pestilence. I'm loving her more, the more I work on her. The original concept I wasn't sure I was satisfied with, so I tried re-designing it. I've been having a hard time drawing her for some reason. So, I decided to try to help myself out by painting the skeleton as her anatomy shows, on her show side. I then drew that onto a piece of paper and started drawing in the muscles.

... I didn't get very far.

Then I decided, "Well, why not start emaciating her?" At this point I was feeling pretty bad about the fact that she hasn't progressed when Pestilence (the commission) is nearing the sculpting stage. I had decided to try and finish them up at the same time so I could photograph them together (which is something I have yet to do; photograph two zombies in one scene!) So I got to work. She didn't cooperate as well as Pestilence did, but she's passable right now.


I was careless with the flame which caused her to burn in quite a few places. Initially, I was going to try to avoid it, but after I had burnt her once, I realized it's giving her a nice effect. Some areas look diseased, others look like open wounds, and the rest look like a maggot infestation. I really like it, a lot.


I'm still rethinking her design. Her neck will remain generally the same even if I resculpt it, but I'm thinking of using a skull on her, too. I'm just really liking how the painted skull is looking.

So, yup! Expect to see more of both in the near future!

Over and Out!

Saturday, October 17, 2015

Tutorial: How to Carve Hooves with a Carbide Scraper

Carving hooves is a tedious, but worthy task. If you're a live show goer, or just appreciate realism in your models, carved hooves are a must. How do you achieve realistically carved hooves, and what do you need to do it?

Carving hooves can be done with a rotary tool (such as a dremel), a scalpel/x-acto knife, or carbide scrapers.


The dremel gives you little control, but has the bonus of giving a quick, passable hoof. The scalpel is dangerous, and if you're clumsy like I am, you'll end up carving into yourself more than you will the hoof. The only time I would recommend using a scalpel to carve hooves, is if you're carving out a stablemate's hooves or refining already carved details. And barely even then.

The carbide scraper (available at Rio Rondo) is by far my most favourite tool for this. I have complete control over how much I carve out and what I carve out. Plus, I can't cut myself (at least, I haven't yet,) and there's the added bonus of it being a manual tool! If you know me, you know I'm terrified of power tools.

In 6th grade I broke the belt sander in woodshop and just barely missed cutting my hand off. The belt got the pad of my middle finger pretty good (split it wide open; there was so much blood I didn't know where I was bleeding from, because I couldn't feel anything). Ever since, anything that makes loud noises makes me nervous. Especially since I'm prone to blowing things up. (I accidentally blew up a hot glue gun for crying out loud! And my washer just a few months ago!) If there's a manual alternative to using power tools, I will ALWAYS take it.

I use tips CS02 and CS04 to carve hooves. (I also use CS06 which I forgot to add)


Make sure the hooves you're about to carve are prepped. Check to make sure the angles are correct (or close) and that the sides aren't flared or bowed. Below are examples of the correct angles.


and good sides.


Take a rat tail file or emery board and make sure the underside of the hoof is flat as well. There shouldn't be any seams or bumps. Shallow divots can be worked with, or you can fill them with epoxy if you wish. Make sure you keep the hoof level as you file. Check down the heel of the hoof to make sure one side isn't longer than the other.

The heel of this hoof is level, the sculptor made one bulb come lower than the other. 
I'll raise it and it'll be perfect.

Also, try not to rock the file as much as possible. We want the bottom to be flat so it has continuous contact with the surface of the table or desk. There's a slight arch in the hoof above, which is okay. It's shallow enough that when it's carved, it'll sit well. We just want to avoid having the arch so severe that one part (or more) of the hoof lifts off of the surface.

Now, let's take a marker (like an ultra-fine sharpie!) and draw out what parts we DON'T want to carve. This will be te wall, the frog, and the bars. When I started carving the hooves on this model, I didn't keep the bars. Since the front hooves don't have bars, I won't include them in the back just so it's even and I'm happy. However, you will want to include the bars in yours, because real horses have them.

The underside should look something like this:

The wall, frog, and bars should be marked with ink. 
The sole, central sulcus, and collateral grooves should be white.

Remember, I'm leaving the bars off simply so it'll match. Add them to yours!

Now, starting with tip CS02, we're going to start carving out the general concavity of the hoof. Start by carving out the collateral grooves. I'm using CS04 for this because I'm not adding bars and don't need a fine tip. Use CS02 if you're adding bars (and you should be!) Your goal here is to separate the frog from the sole. Get right up on that frog, but don't touch the ink just yet. 


Take it deep enough that you can carve the sole out and still have a groove. Don't be afraid to make it too deep - you can always go back in with epoxy later. Start angling your scraper away from the frog so that you'll widen the bars as needed. (Use a reference for this.)


Now, switch to CS04 and carve out the sole. try to leave the bars alone as much as possible. It's okay if the ridge of the bar is accidentally removed, as long as there's a definitive change between the collateral groove and the sole. 

It's okay if it looks rough in this stage.

Refine the smoothness of the sole with CSO4 and then switch back to CS02 and start refining the hoof wall and frog.

I continued the collateral groove past the heel of the wall at this stage as well.


Keep switching back and forth until it starts looking smooth and refined. Then, switch to CS04 and add in the details in the bulb of the heel. (It's hard to see, sorry!)


Now, take either CS02 or CS06 and add in the central sulcus. (angle your tip so that it's running along the line if you're using CS02 for this. This'll make a narrow groove, which is what you want.) You can go back in with a scalpel afterwards, to deepen the groove or refine the area if you want to.


Once you're satisfied with the result of the carving, grab your file and - in an even, circular motion covering the entire hoof - file the hoof flat until you can't remove any more ink.


This will flatten the frog, too, so go back with CS04 afterwards and round it out again.


At this point, if you have any pewter shoes you would like to add, make sure they fit. Otherwise, take your file and, at the edge of the hoof, angle it at around 45 degrees and bevel the edges of the hoof. 

And you're done! 

I hope some of you can put this to use! If you're serious about model horse customizing and you don't have one yet, I highly recommend you get the Carbide Scraper set. I can't live without it now that I have it!

If you have any topics you want me to cover in future posts, please leave a comment! I'll try to cover as many as I can!

Over and Out!

Thursday, September 17, 2015

Tutorial: Tying a Model Horse Rope Halter

Today's post is a tutorial on how to make a traditional (1:9 scale) model horse rope halter!

Rope halters are inexpensive training tools favoured by horsemen and women all over the world. Their thin structure has less surface coverage, meaning corrections are sharper than that of a regular nylon/leather halter. Because of this, it is a favoured tool for green horses who need a clear signal, and stubborn horses who are maybe a bit pushy or hard to handle otherwise and need loud and clear corrections. Because of this, Rope Halters should be used with caution.


However, these halters aren't always used for training! Because of their minimalist and light design, they fit well under bridles and are perfect for trail and endurance rides. Oftentimes the lead is looped around the horn of a western or outback saddle, and if used on an English horse (or the saddle doesn't have a horn), can be loosely tied around the horse's neck in the appropriate knot, or stowed in a saddlebag or bookbag if present. This gives the rider a safe and convenient means to tie the horse up should they happen to stop for a break, or for any other reason, without creating too much bulk.

Today, I'll be creating a halter for my horse, Irish Diamond, who will be customized to resemble my last horse, Big Irish Red.


 Because of the "Irish" theme going on here, I've decided to use a nice vivid green that will pop on both Grey and Chestnut.

Some things you'll need, are:

Six-strand embroidery floss or any similar thickness "thread." Beading cord works well. I would generally avoid plastic cord or elastic. Plastic is too rigid and won't tie well, and elastic is too stretchy, meaning you may not get an accurate fit. 1 millimeter (mm) or thinner elastic may work. Experiment with different threads and cords to figure out what works best for you! I will be using embroidery floss for this tutorial.

A pair of sharp scissors. Sharp scissors are recommended, because you will get a clean cut in your "rope" making it easier to work with when threading through the knots and loops.

A ruler or tape measurer for measuring "rope" length. I will be using a tailor's tape measurer today.

Water or other means to wet the thread. The edges will fray the more the thread is handled, so wetting the ends will make it easier to thread through the knots and loops.

Super Glue, fire, or tape. When the halter is made, you will want to secure the crown ropes together, so they're easier to thread through the tie loop.Superglue works just fine in most cases, but if nylon thread is used, fire might fuse the threads together. Alternatively, tape (ducttape) can be used. Super glue works fine for me, so this is what I will be using.

A body or body double of the model you will be making the halter for. I recommend using a body.

A chopped up toothpick to hold the knots open. (Optional) and at least one full toothpick to work the knots and loops. (not pictured)


Halter fit is a topic I will cover at a later date,  but for now let's take a briefing.

The biggest problem in this hobby is halter fit. Oftentimes, I'll see nosebands too low and cheek pieces too long.

This is incorrect.

The correct fit of a halter means that the throatlatch should sit snugly (NOT TIGHTLY) behind the jaw. The cheek piece should be the length of the horse's cheek, and parallel with the cheek bone, and the noseband should rest right in front of the cheek. The halter rings should be just below the cheekbones evenly on both sides, and the lead loop/bottom of the noseband should not hang visibly low off the jaw. On a real horse, you should be able to fit two fingers under the noseband and the throatlatch at any given time,


The same is true for rope halters, save that the throatlatch tends to rest in the middle or last 3/4 of the jaw. (This is also true for some nylon web halters)

So, now that we have the proper fit fresh in our mind, let's get to work!

To find the minimum amount of rope or thread for your scale of model, take 650 and divide it by your scale (650/9 for traditionals; 650/12 for classics, etc) This will give you the length in centimeters.

You will need a minimum of 72 centimeters of thread or cord for a traditional. I will go 80 just so I have room for mistakes.

Measure and cut your thread, and then fold it in half to determine where the noseband will start.


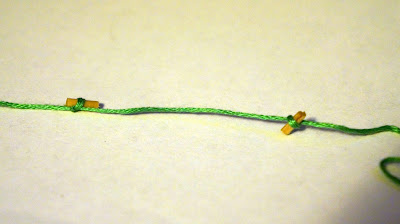
Place the center of the fold in the center of the model's face, putting it in the correct spot for the noseband. Then, with your free hand, gently pull one strand to one side of the face, pinch the spot under the cheek bone and tie a loose knot there. I use pieces of toothpicks to hold the knots open, as I am clumsy and have accidentally locked knots in the past. (if you are using a stiffer thread or cord, you won't have to use anything to hold the knots open)


Now, place the knot back in place on the horse's face, and do the same for the other side. Make sure they are even. Loosen and adjust the knots as needed until they fit.


Now you should have something like this:


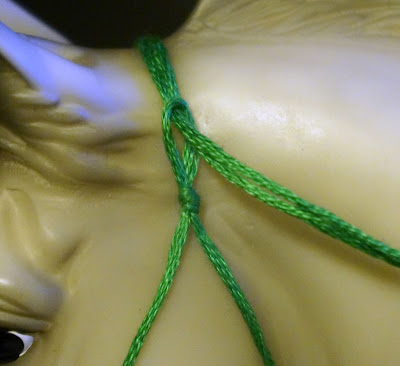
Next is to make the lead loop. Put the "rope" back on the horse's face and - making sure the knots are in their correct places -  pull both threads together at the bottom of the jaw and pinch the area the knot will be at. If you know how to do a fiador knot, you can do that here. However, I don't, and I don't need anything so fancy. So, I will be doing a simple knot.


Instead of pulling the thread all the way through the knot, make a loop. Make sure the cheek knots are even and work the loop knot up into place. Check the fit before finalizing this knot, as doing it wrong will ruin the halter's fit. Remember, you want the knot to rest just below the jaw, not hanging off the face.

This is too loose.

Make sure the loops are even and small. You should be able to fit a claw clasp easily without too much room to spare. If you find the loops to be uneven, pull gently on the individual strands until they're even.

Tip: Shoving a toothpick in the loop and tightening it will prevent the loop from getting too small.You can also gently wiggle and push down on the toothpick to loosen the loop as needed.

Using the toothpick to manipulate the loop and knot.

When the loop is satisfactory, set the knot. This is where I tend to accidentally set the cheek knots, which is why I use toothpicks to hold them open.

That's better!

Now we will be making the straps that run under the jaw. Placing the noseband back on the model with the strands facing the back of the horse's head, go up the jaw to about 3/4ths the length and tie another knot using both strands at the same time. (the same way you did the loop knot, but without the loop.)


At this point, you will want to separate the strands. They will usually tell you which way they want to go, so use the one closest to the left side of the horse first. Take it up the horse's jaw, and - keeping parallel to the cheekbone (imagine a line running from the cheek knot to this point) pinch where you want to tie the next knot.

Left strand (bottom), Right strand (top)

This will be another loop knot, and possibly the trickiest of the two. You don't want it to be set too high, and you don't want it to be set too low. To check this, make sure the knot below the jaw (where the string you're holding came out of) is centered in the middle of the jaw. Hold it there and use your free hand to measure and mark the next knot. You are marking the knot's location, not the loop. You want this knot to be able to run as close to a parallel line as it can between it and the cheek knot, and the cheek bone!


Tie the loop knot the same way the lead loop knot was made. This loop has to be large enough to thread the crown strands through in the end without being too large. The toothpick is a good aid for achieving this, again.

After that's done, take the string remaining from the loop and thread it through your cheek knot. Take your time to adjust it. You want the cheek piece to support the noseband and keep the throatlatch from deviating. So, you want it to be the length of the cheek bone, roughly.

Tighten the knot on the rope when you're sure it's in the right place.

Now, take that same strand and go OVER the nose, and thread it through the second cheek knot. MAke sure you adjust the knots so everything fits even after they're tightened. 

Next, take the same strand we've been working with and meet up with the throatlatch strand we abandoned a while ago. Your goal here is to match the lengths up with the other side, so feel free to take off the halter and compare your "coordinates" with the finished side. Once you've got it matched up, tie another knot. Put the halter back on and pull the two strings over the horse's poll to check the fit.


If it fits, go ahead and thread the crownpiece through the loop and trim them to fit. I trimmed mine slightly long, because I knew I was going to mess up the next step. 


This is where the super glue comes in. Take the end and put a small drop of superglue on it. (I've found that wetting the ends, rolling them together and then shoving them into the nozzle of the super glue bottle works best)


Take your index and thumb and roll the ends together while the super glue is still wet. This will get on your fingers so wear gloves if you're sensitive. keep rolling until you can feel it cure.

Now the strings will stay together and make it easier to thread through the loop!

While you've got the superglue out, go ahead and put a small drop on the loops, and use the toothpick to distribute it throught the entire inside. This will reinforce them and keep them open so you can thread and clip easily. (Work one at a time.)


The finished halter!


The smaller you go, the thinner the material you use. On this stablemate portrait I did, I used some sort of golden thread.


I hope you found this helpful, and if you have any ideas or topics for future tutorials, let me know!

Over and Out!