Monday, April 11, 2016

SPN61 Update 4/11/16

    I'm so excited!! I've finished the updated concept for SPN61 and there's not much left to do on the sculpt! What I did, was I sculpted the basic pose and shape I want, and got the neck to a point where I was happy with the details. Then, I drew what I had on paper, and sketched out the extended detail concept - what I have to sculpt next.

    Basically, all that's left to do is add the little details and the mane, ears, and tail. Then I'll be able to bake and prep him for casting! If he doesn't act up again, I should have a reveal by the end of April! (Don't hold your breath though! I'm bound to get stuck somewhere!)

That's all for now!
Over and Out!

Friday, April 8, 2016

SPN61 Update 4/08/16

No one's figured out the name yet?

Anyway, I've finally gotten its neck to a good spot. I've been fighting with its neck for what feels like a month (It probably was,) but now I can finally move on! I'm probably going to leave it as it is for now while I go re-draw the design. Nothing major, I just can't continue until I know exactly how I want to do the details. Since I haven't revealed what it is yet, this might sound a bit confusing or counter-intuitive. All in due time!! 

I doubt he'll be done by mid-April as originally intended, but anything's possible! I'm aiming for the beginning of May, with mid-may at the latest. All that's left to do is refining, so it really shouldn't take all that long to do.

Saturday, April 2, 2016

Tutorial: Give Me a Hand, Here!

    Today's tutorial will show you how to fix the Breyer rider's hands to hold the reins more properly. I was requested to make this tutorial after posting a close-up of my Yvonne doll's modified hands on deviantART.


They were only modified to hold the reins between the pinky and the ring finger. I didn't alter anything else. Today, I'm going to show you how to alter your rider's hands so they can hold the reins with a tight grip, and between their pinky and ring finger!

So, here's what you'll need:
  • A Cutting Board
  • A candle or heat source
  • A knife (Preferably an x-acto knife, but any razor sharp blade will do)
  • The rider you want to modify
  • A spare bridle or piece of lace to use as the reins

    Okay! So, before we get cutting anything, let's take a look at how reins are supposed to be held (English or barrel reins [when using two hands], not split or romal reins.) I have a set of reins laying nearby, so I'll show you quickly how the rein is held. Ideally, you want your hands closed tight around the reins. Basically, make a fist. I had to loosen my grip to get these photos, because I had to use one hand to take the picture. If these aren't clear enough, try googling it!


    Now that we know what it looks like, let's get to work! For a single set of reins, the rein should come out of the bottom of the ring finger, like pictured above. So, we're going to cut the pinky away, as shown here:


    You don't have to map it out if you don't want to. I did, to show clearly where I was going to cut. Now, if you're needing the rider to hold a double set of reins, such as with a full bridle or pelham bit, you'll want to cut the ring finger away as well, following this second line here:


    Today we're only doing the pinky. So, start heating up the hand with your heat source. Try to get only their fingers, as if you heat too much up, you may warp their hands in unnatural ways. 


    You may have noticed I burnt her thumb. Always be careful when dealing with heat! Be sure you disperse the heat over the area; don't just hold it in one place. Also, be careful not to burn yourself!

    Once you get their hand heated up, Lay their hand down and take your knife, and cut along the crease of the pinky. The fingers may flatten out; this is okay. Be careful to cut only the crease, as you may weaken the integrity of the fingers if you cut anywhere else.

DO NOT CUT LIKE THIS!! You WILL cut yourself!
I had already cut her finger away, but I couldn't get it on camera, so I had to hold it like this for the picture.
 LAY IT ON THE CUTTING BOARD TO CUT!!!
    At this point, you should be able to move their pinky independently from the rest of their fingers. Now, re-heat their hand and press the flat part of their fingers (by the top knuckles) into the cutting board. You want to start closing their fingers into a fist. Hold the hand in place until it cools down. You can gently blow on it to aid in cooling. 

I thought I had a picture of this! Sorry!

 Now, get that spare rein I mentioned, and shove it in their palm. We're going to start closing their fingers around the rein. For this stage, I have a thick cotton rein. The idea here was to have the thicker rein in place so I didn't close her hand too much, but I ended up needing to close it more anyway, so you can get away with a thin leather lace if you want to.


Now reheat their hand, and press the fingers around the reins. You don't have to worry about getting a round shape just yet, but you are certainly welcome to try. There's no right and wrong way to do this, just as long as you keep working to achieve your end goal.


    Keep heating and working it until you get the right shape you want.


Here's what the finished hand looks like compared to the original:

Hopefully yours won't have a burnt thumb!
    Now do the same for the other side! Your rider will then have a tight grip and reins won't be able to fall out very easily! If you're still not satisfied with your hands, keep working with them until you reach a point that you're happy with. You can always come back to it later if you decide you're still not happy with it!

She won't be letting go of those reins any time soon!
    For the best results, use skived reins. These ones are a bit too thick, which makes them stiff and not want to sit on the pinky right. If you use the correct thickness of lace, the riders will have a better time holding the reins between their pinkies.

    I hope this helped! If you have any questions or suggestions for future posts, please leave a comment!

Over and Out! 

Friday, April 1, 2016

Copperfox 10 Day Challenge: Day 10

Today is April Fool's Day! I promise I have no tricks up my sleeve! 

Day 10:
Imagine a story or create a character
If your model horses came to life, what would they do? What adventures would they go on? Pick one of your models and create a mini story, storyboard/comic or images of your models as real life horses, characters or personalities.

    I used to do this all the time as a kid! For some reason, my Irish Diamond was always getting loose and running wild and my riders would always have to mount up and go after him. I don't know why; he's not really a rowdy model! Now, Isadora Cruce I could see, but not Irish. Maybe that's why?

    Even still, whenever I take photos of my models, I tend to have some sort of story to tell. Since I can't really create a new story at the moment, I'll post some of my photos and explain the stories I had in mind when I took them!


    This one depicts Yvonne and John enjoying a nice evening ride. The stable is nearby a lot of rock walls and shelf systems, so they needed to explore! I think when I did this one, I had the idea of them being on horse watch (because you know me - there's always a horse loose!) So, they're probably covering all of their bases and travelling in groups. I only brought these two when I went out, but we can pretend there are other groups out looking, eh?


    Keeping on the subject of "loose horses," this is a (bad) picture of John returning after taking Felix out to retrieve the mare that had escaped her paddock. Naughty little mare! Luckily she was just curious and didn't mind the rider approaching! Maybe he should do a fence check and repair the broken fence before letting her out again? (Fun fact: these are the same two horses as the ones in the first picture!)


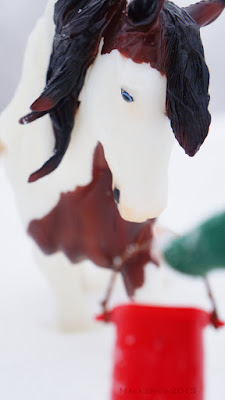
    It's a cold winter morning and Tiffany is out with a bucket of grain. Breakfast! Boon greets her first, with Valentine close on his heels. Felix and Misty start making their way toward the girl as they pick up on the sudden change of attention. Is that food, they hear?

    Tiffany offers Boon the bucket of grain.

    That's actually all I've got! I thought I had more than that, but apparently not... oh well. I hope you liked it anyway! Before I go, remember these words today, as pranks know no bounds:

;) 
(Don't assassinate anyone. That's a terrible practical joke. And also illegal. And bad. No-no.)


Over and Out!

Thursday, March 31, 2016

Copperfox 10 Day Challenge: Day 9

Day 9: Plan to go to a live show or enter a photo show
A bigger challenge for today! Find out what live shows are in your area and plan to attend one. Live Show is one of the best parts of the model horse hobby and the best way to experience them is to have a go. Alternatively, find a photo show online and enter a picture.

     Yay! One I can do without doing anything! Last year I started searching for live shows in my area. That was an endeavor! Unfortunately, I'm in such an odd spot in Kentucky that live shows are just... not common. The only Live show up in Lexington that I can do is during Breyerfest, which requires that I go to Breyerfest. I've only gone to Breyerfest once in my life and, while I plan to go in 2017, I don't have much hope for going in 2016. So, that leaves one more show in my area:

The Big Orange Bash in Knoxville. I'm hoping to go this year, but I have literally no show string, and I have no money for props. Chances are low that I'll go, but I'm definitely planning for it!

If any of you know of any live shows in the South-East Kentucky/North East Tennessee/Western Virginia area (they don't have to be NAN-qualifiers) please let me know!

Over and Out!

Wednesday, March 30, 2016

Copperfox 10 Day Challenge: Day 8

Day 8: Join a Model Horse Group, Forum or Club
There are so many fabulous groups, forums and clubs out there both online and offline to join, all over the world. Joining a group (or forum or club) is a way to chat to other like minded individuals about your models, to share ideas and be part of the community that has the same interest as you.

    I actually run and help run a couple groups. I run the Breyer-Lovers-club on deviantART (which will be opening up to all model horses, not just Breyers,) as well as Plastic Pony Photos on Facebook. You're more than welcome to join either (or both) of them!

Over and Out!

Tuesday, March 29, 2016

Copperfox 10 Day Challenge: Day 7

Day 7: Share your favourite piece in your model horse collection
What is that piece in your collection that you would never part with? It is the first model you owned, a customised model or a piece of hand crafted tack?

    I don't have anything in my collection I absolutely wouldn't part with. If the price is right, I would part with a lot of the things. However, I have two models in planning that I would never part with.

    Those would be portraits of my last two horses, Irish and Dakota:


Irish
Also Irish
Dakota
Very old picture of me on Dakota... from 2010/2011

    As well as whatever portrait I make of my next horse. (As I am currently horseless.)

That's all for this post!
Over and Out!


Monday, March 28, 2016

Copperfox 10 Day Challenge: Day 6


Day 6:
Find a new artist/sculptor/tackmaker that you don't already know about
Today's challenge is about finding something new. Trot onto the Internet and find the work of a new artist, sculptor, tack maker, hobbyist- anyone within the model horse hobby that you don't know about... yet!

    I can't even tell you how hard it is to find new artists in the model horse hobby. When you google "Custom Model Horses," you usually get customs from all the well-known people. Funny enough, I was looking up colour formulas when I found this person!

    I don't think I'm allowed to post her photos here, so go check out her site and look at her wonderful work!

Sunday, March 27, 2016

Copperfox 10 Day Challenge: Day 5

Day 5: Create something for your models or try a new skill
The model horse hobby is full of things to create both for your models or using your models. Today's the day to be brave and have a go at creating that jump for your models or to have a go at painting your horses hooves.

    I don't have enough time to create something new yet, unfortunately, so here's my first tack set I made last year!


That's all for now!
Over and Out!

Saturday, March 26, 2016

Copperfox 10 Day Challengs: Day 4

Day 4: Your Favourite Model Horse Picture
What is your most favourite model horse picture? Maybe you already have one or maybe you can create a new one?

    This one is:


    I just love the feeling of adventure in it, and how much fun it looks!

That's all for now!
Over and Out!

Friday, March 25, 2016

Copperfox 10 Day Challenge: Day 3

Day 3: Be a Model Horse
Imagine yourself as a model horse. What colour would you be? What mould would you be created on? What scale?

    If I was a model horse, I would be Traditional scale. I would probably be on the Cigar mould, because I love to run, I've been debating on what colour I'd be if I was a horse. I think I would probably be a light Amber Champagne, or a dark perlino, because I'm so white that when I lay down in the snow, I'm perfectly camouflaged, and I perpetually have this strange farmer's tan even in the middle of winter. Also, my hair is naturally this ashen auburn and... I don't know, I'm just a strange colour! I could also be a black horse, but my hair is only dyed black, it's not black naturally. So, I'll stick with a Champagne!


(I'll update with a scanned version later)

That's all for now!
Over and Out!

Thursday, March 24, 2016

Copperfox 10 Day Challenge: Day 2


Day 2:  Name your model or barn 
    Have a go at naming the most recent addition to your herd by giving them a show name, stable name and pet name. As further ideas, why not do the same for your barn or stable yard and then make a barn tour video?

    My most recent addition to my herd is Jesse, so here we go!


Show Name: Thunder's Last Dance
Stable Name: Thunder
Pet Name: N/A
  
    I honestly can't think of a pet name for him. I usually call all of my real horses "Cutie" or "Big guy" or "Pretty girl." None of them had a pet name. They had a lot of OTHER names, but those weren't really... friendly. There was one horse at the barn that I used to board at whose barn name was Blue, so we all called him "Boobie." Yeah, maybe not the most flattering of names, but it was his.

The Bald horse behind Toby is Blue.


    I've been toying around with names for my model horse "stable yard" despite the fact I don't have any barn setups. So, sorry, but there won't be any barn tours, haha! I'm still working on the name, but for now I'm referring to my nonexistent stable yard as "Seventh Seal Stables." I know, original, right?

    Anyway, that's all I have for this post!

Over and Out!

Wednesday, March 23, 2016

Copperfox 10 Day Challenge: Day 1

    I'm going to be very busy in the studio working on SPN61, and on top of that I just got 6 commission orders, so I'm almost 90% sure I'm going to be bogged down for the rest of the year, since I have other commissions and projects I'm still working on. Still, I want to start posting more here on the blog, but between sculpting SPN61 and drawing the concepts for these new commissions, I'm not going to be able to post all that much.

    Well, I heard about the Copperfox 10 day challenge, and I thought, "That's perfect!"

    So here we go!

    Day 1: Inspiration Day
    An easy start to our challenge! Find something that inspires you. It could be a picture of an unusual colour of horse that you would like to turn into a model, a how-to tutorial video or a piece in your favourite magazine about collecting things that you love. Or it could be a song, film, piece of poetry- whatever it is, find something that gets your creativity going!
Post-writing edit: I've realized that nothing model horse-related was mentioned in this post, but I want to make it clear that the inspiration I gain from the subjects in this post also pertains to model horses. :)

    So many things inspire me, to be honest. I could be sitting here, staring at the wall, doing nothing but listen to music, and then I'd get an idea and want to spring into action. In fact, one of the reasons why I moved to my current location was because it keeps my creativity flowing.

    Back in Ohio, I would constantly hit creative blocks. I'd be jumping around everywhere, wanting to write one moment, wanting to draw the next, wanting to sculpt, to paint models... and then I'd just hit a dry spell, and that dry spell could last months. I'd bring my drawing binder with me whenever I'd leave the house, because I always felt more motivated to draw at other places.

    Of course, by the time that I had picked up the pencil, I no longer wanted to draw, because I didn't know what to draw. I had gotten so used to just drawing horses, that they became my go-to subject. People always asked me why I didn't draw other things, and the truth was, I didn't know what else to draw.

A cartoony sketch of the Red Dead Redemption: Undead Nightmare unicorn I did in 2013 while visiting Dad.

    Then, one time that I was visiting family here in town, my aunt got in the truck and I hopped in the bed, and we headed up into the mountains. We went to old surface mines, up to a lake she knows about, and then, while the sun was setting, we'd set out to try and see how many abandoned graveyards we could find before 3AM. I know, it's not the most normal thing someone can do, but it really inspired me. We were isolated out there. Just... alone, in the mountains, with nothing but trees, the deep rumbling growl of the engine, and the night sky around us. Plus the occasional rabbit or snake, or deer, but it was mostly just us.

    Sometimes, when we'd find this open stretch of a gravel road and a valley view on one side, we would stop the truck, and turn it off. Everything would instantly fall silent, and all you could hear was the distant chirps of tree frogs and crickets. They always seemed to be a mile away, because we could whisper and hear each other loud and clear. By the time our eyes had adjusted, we could only see maybe 10 to 20 feet around us. Everything in the distance was just pitch black. We would laugh and each (there were 4 of us) take turns running into the darkness and then shuffling back, groaning and wobbling like a zombie.

This was taken on one such open gravel road during the sunset.
    It was really peaceful out there... I felt at home.

    We went out almost every day to try and find a new trail; a new destination to journey to. Most of the places were in the same areas as the trails we had already explored, but that's the beauty of this place. When I drive the road to town, I'm constantly finding new trailheads to wander down. It makes me look forward to having a horse more and more.

    Anyway, one of the places we had ventured to, required us to get out of the truck and walk. The trees were barely carved into a tunnel, and we were constantly running into spider webs. It was incredibly dark through there, with the tree branches and lower shrubs reaching their limbs out at us from both sides.


    We kept on, though, with the promise of a brook, fueling the adventure. We'd hit occasional open spots, where the canopies would retreat and you could see the sky overhead. The trail ahead looked like nothing but a dark, black pit. 


    The trail went on for a while, but it was relatively short compared to some others that we had been on. Still, it made for some beautiful photography, if you could find the right lighting.


    Eventually, the sound of gurgling water grew louder, and the trail started to open up. The brook could be seen just up ahead, but I didn't know what to expect. At first I was slightly disappointed, because it looked no bigger than a small mountain stream...


    I was wrong. The trees opened up to a wide, rocky bank, with a shallow, but wide, brook flowing cleanly over the shale. I immediately kicked off my boots and ran into the water.


    The water quickly got too deep for me to travel without ruining my phone, so I had to stay in the shallow side and try to get some photos justifying the beauty of the place.


    I failed. This is truly a place you just have to see for yourself to understand and experience the full effect of.


     It's my understanding that the trail leads across the brook, and that leads to one of my favourite campsites. No one can say for sure, and I don't remember how to get here, so I guess we'll never know... unless Bill would be nice enough to take me back here.


    Every time we head out into the mountains, I always feel energized. I always come back wanting to draw, or to be creative, or to write. I love it here. It's like my own personal antidepressant.

    And honestly, with my own back yard looking like this, how can I not feel inspired?


That's all that I have for today!
Over and Out!

Tuesday, March 22, 2016

SPN61 Update 3/21

     SPN61's ears have been the bane of my existence from the moment I started sculpting them. They either won't get the right shape, they'll collapse altogether, they're set wrong, they look funny, or they just. Seem. Off.

I can't honestly say that I'm satisfied with them, but they're at a point where I'm done fussing with them and if I don't like them, I can always fix or redo them later. Maybe once I get the mane sculpted, they'll look better?


Pardon the mildly dirty sculpey. No matter how vigilant I am about washing my hands and not touching anything but my tools and the clay, there always seems to be some sort of dust or lint that finds its way into the mix. Maybe I need to set up an air-locked sterile room to use as my studio?

That's all for now!

Over and Out!

Saturday, March 19, 2016

Sculpture Update

[3/18] The head is on and I'm refining the neck. Not long now until I can do some body detailing! (Remember, the hint is SPNe61! Have you figured out what that means yet?)


Since this post was too short for my liking, I'm adding to it.


[3/19] Sculpting is going well. The facial muscles are being sculpted currently, and soon I'll be moving on to the ears and mane (possibly. I don't know if I'm going to do the hair last or not.) I'm still refining bits and pieces as I go, while trying not to squish them as I work since I won't be baking it until the body is done, because the detailing I have to do requires that the clay stay soft. Well, it's not really that it requires it to be, but it makes it easier to blend if it is.

I know I said I wasn't going to include any photos, but I decided I might as well. Here's a non-identifiable close-up. ;)


Until someone figures out what SPNe61 means, I will refer to this sculpt as "SPN61."

Over and Out!

Thursday, March 17, 2016

Sculpture in the Works

After recently acquiring a 24-lb box of polymer clay and receiving a donation/investment of supplies from my sister (including a spool of armature wire,) I've decided to start sculpting a model horse!

Unless you follow me on Instagram, you likely haven't seen the design. I'm not going to show anything major about the sculpt until it's done (it's about halfway now!) I'll only drop some hints as I work.

When he's finished I'll be opening him for pre-orders so I can start casting. If you think you might be interested, keep tabs on his progress. I likely won't be talking about him on instagram unless it's through non-related or non-identifiable pictures, so his vague updates will be posted here more than likely. He has quite a way to go before he's finished - tons of detailing to come - but I've got the design handy and I'm working hard to make it real!

I do have a price in mind, so if you think you'd like a copy, or might be interested, feel free to email me. The sooner I get pre-orders, the sooner I can get casting!
 (I won't accept any paid pre-orders until he's complete and ready to cast, but if you think you might want one for sure, I'll write you down and contact you first before announcing him open for pre-orders!) 


Here's my hint: SPNe61

Over and Out!

Monday, January 18, 2016

Happy New Year!

Happy new year, everyone!

So sorry for the hiatus! Over the Christmas and New Year holidays, I've been spending time with family and planning out the first orders of business for 2016!

I have TONS of things planned this year, and I'm very eager to get going!

I'll be spending the next month or so (maybe not that long, but we'll see) planning some posts for this blog, including some tutorials, colour conversations (analyzing colours in a way that will hopefully help them make sense in the way of painting) some updates about the goings-on in the studio (this one's real exciting!!!) and all that good stuff!

So hopefully you'll join me in the journey that is 2016 and we can make this year a good one!

That's all for now!

Over and Out!